Quantcast
Channel: Brian Reid – Brian Reid
Viewing all 187 articles
Browse latest View live

How To Change Your Office 365 App Password

$
0
0

If you are enabled for Multi-Factor Authentication (MFA) in Office 365 then you will need an App Password for some applications that do not support MFA. The user interface for creating a new App Password is quite well hidden in Office 365 (its not on the Password page for example).

Here is how to find it.

  1. The user logs into Office 365 portal (http://portal.office.com) and clicks the cog icon to the top-right of the page
  2. Click Office 365 Settings
  3. Scroll down past Password and choose Additional Security Verification
  4. Click Update my phone numbers used for account security
  5. Click “app passwords” on the top menu. This takes you to https://account.activedirectory.windowsazure.com/AppPasswords.aspx. You can (and therefore should) bookmark this page now so you don’t need these instructions again!
  6. Create yourself an additional app password and give it a description.
  7. Use the new app password in the program that you need to login to.

Managing Office 365 Groups With Remote PowerShell

$
0
0

Announced during Microsoft Ignite 2015, there are now PowerShell administration cmdlets available for the administration of the Groups feature in Office 365.

The cmdlets are all based around “UnifedGroups”, for example Get-UnifiedGroups.

Create a Group

Use New-UnifiedGroup to do this. An example would be New-UnifiedGroup -DisplayName “Sales” -Alias sales –EmailAddress sales@contoso.com

The use of the EmailAddress parameter is useful as it allows you to set a group that is not given an email address based on your default domain, but from one of the other domains in your Office 365 tenant.

Modify a Groups Settings

Use Set-UnifiedGroup to change settings such as the ability to receive emails from outside the tenant (RequireSenderAuthenticationEnabled would be $false), limit email from a whitelist (AcceptMessagesOnlyFromSendersOrMembers) and other Exchange distribution list settings such as hidden from address lists, mail tips and the like. AutoSubscribeNewMembers can be used to tell the group to email all new messages to all new members, PrimarySmtpAddress to change the email address that the group sends from.

Remove a Group

This is the new Remove-UnifiedGroup cmdlet.

Add Members to a Group

This cmdlet is Add-UnifiedGroupLinks. For example Add-UnifiedGroupLinks sales -LinkType members -Links brian,nicolas will add the two names members to the group. The LinkType value can be members as shown, but also “owners” and “subscribers” to add group administrators (owners) or just those who receive email sent to the group but not access to the groups content. To change members to owners you do not need to remove the members, just run something like Add-UnifiedGroupLinks sales –LinkType owners -Links brian,nicolas

You can also pipe in a user list from, for example a CSV file, to populate a group. This would read: Add-UnifiedGroupLinks sales -LinkType members -Links $users where $users = Get-Content username.csv would be run before it to populate the $users variable. The source of the variable can be anything done in PowerShell.

Remove Members from a Group

For this use Remove-UnifiedGroupLinks and mention the group name, the LinkType (member, owner or subscriber) and the user or users to remove.

To Disable Group Creation in OWA

Set-OWAMailboxPolicy is used to create a policy that is not allowed to create Groups and then users have that policy applied to them. For example Set-OWAMailboxPolicy “Students” –GroupCreationEnabled $false followed by Set-CASMailbox mary –OWAMailboxPolicy Students to stop the user “mary” creating groups. After the policy is assigned and propagates around the Office 365 service, the user can join and leave groups, but not create them.

Control Group Naming

This feature allows you to control the group name or block words from being used. This is easier to set in the Distribution Groups settings in Exchange Control Panel rather than via PowerShell. To do this EAC use Recipients > Groups and click the ellipses icon (…) and select Configure Group Naming Policy. This is the same policy for distribution groups. You can add static text to the start or end of name, as well as dynamic text such as region.

Admins creating groups are not subject to this policy, but unlike DL’s if they create groups in PowerShell the policy is also not applied and so the -IgnoreNamingPolicy switch is not required.

Using Office 365 PST Ingestion Service

$
0
0

Its been in private preview for a while, and recently entered a free preview for any Office 365 subscriber to try. So I gave it a go and have the following tips and guidance.

Preparing to upload PST files

You can upload PST files in situ from their current location on the network. There is no requirement to first copy them to a new folder for uploading. To do this requires a few things to consider, not just including running the AzCopy process with an account that can access all the content.

AzCopy is the command line tool used to copy your PST files to Azure in advance of importing them into Office 365 mailboxes. You do not need an Azure subscription to do this, and until September 2015 this is a free service. To do this in-situ upload of PST files without first copying them to a local network staging location you should include the /Pattern: property in AzCopy. This is documented in the AzCopy help but not currently in the PST Ingestion help on TechNet (https://technet.microsoft.com/library/ms.o365.cc.IngestionHelp.aspx?v=15.1.166.0&l=1). Using AzCopy without /Pattern will upload everything in the source path. As this is a PST ingestion process, you only want *.pst as the /Pattern. When this ingestion process starts to include uploads for SharePoint, then /Pattern will of course not be as useful a value to include.

In the following example, AzCopy is reading from a folder called “C:\Shares\Users” (/source:) and looking in all subdirectories (/S) and only uploading *.pst files (/Pattern:”*.pst”).

azcopy /source:”C:\Shares\Users” /Dest:https://uniqueurl.blob.core.windows.net/ingestiondata/20150101 /DestKey:uniquekey /Pattern:”*.pst” /S /V:”c:\temp\pstIngestion20150101.log”

The data is uploaded to a folder called ingestiondata/20150101 in your Azure storage blog for the PST Ingestion process (notice no space after the URL and before ingestiondata as shown in TechNet). Each file is uploaded to a subfolder of this folder that matches the folder it is located on in the source. For example, if the following folder structure existed:

image

Then in Azure storage the structure would be like the following:

ingestiondata/20150101/Jenny/Outlook Files/2009/jenny2009.pst

ingestiondata/20150101/Paul/archive.pst

ingestiondata/20150101/Simon/PST Files/2009/SimonArchive.pst

ingestiondata/20150101/Simon/Archive2011.pst

Notice that the folder structure underneath the /Source: path is duplicated to Azure, and for a real world scenario, notice that Simon has two PST files in different folders. The /Pattern property of AzCopy will find both even though they may not be where you expect them to be. The 20150101 value is just a unique value that I have used (its a date) that I would change for different uploads, meaning that different uploads would never clash with an existing upload. In TechNet it suggests a name that represents the file share that you set as the source value, so that two uploads from two sources cannot over write each other. So in my example I might do an upload on a different day, and so use a different data value or I could use CUserShares as a way to represent the local upload and FileServerHome to represent \\fileserver\home. If I used FileServer/Home (changing \ for /) then I am creating additional subdirectories in Azure storage and this needs to be taken into account.

Preparing the PST Mapping File

Once the upload is complete, and note that this is best done overnight as it maximises bandwidth use, you have 30 days to import the files from Azure into your mailboxes. To do this you need to create a CSV file like the following:

Workload,FilePath,Name,Mailbox,IsArchive,TargetRootFolder,SPFileContainer,SPManifestContainer,SPSiteUrl
Exchange,20150101/Jenny/Outlook Files/2009,jenny2009.pst,jenny@contoso.com,FALSE,Archive_jenny2009,,,
Exchange,20150101/Paul,archive.pst,paul@contoso.com,FALSE,Archive_Archive,,,
Exchange,20150101/Simon/PST Files/2009,SimonArchive.pst,simon@contoso.com,FALSE,Archive_SimonArchive,,,
Exchange,20150101/Simon,Archive2011.pst,simon@contoso.com,FALSE,Archive_Archive2011,,,

In Excel, it would look as follows:

image

This has a few important elements in it. Mainly the Name value (for the PST filename) is case sensitive which is not documented in TechNet at this time. I guess the FilePath is as well, but I did not come across that issue as I set all the case to the same as the source. The name matches the PST filename, and the FilePath matches the value after “ingestiondata” in the URL including the path the file was uploaded from. Therefore in my example for Jenny above, where the PST file was called “jenny2009.pst” and the path on the local file server was “C:\Shares\Users\Jenny\Outlook Files\2009\” and the /Source: was “C:\Shares\Users” and 20150101 was used as the value in the /Dest: following the URL, the result of the FilePath in the CSV becomes “20150101/Jenny/Outlook Files/2009”. That is, the CSV needs to have a FilePath that includes Dest (after ingestiondata) and the local source with \ changed to / and not including the /Source: value.

A second example, if I used the following AzCopy cmdline:

azcopy /source:”\\fileserver\home” /Dest:https://uniqueurl.blob.core.windows.net/ingestiondata/FileServer/home /DestKey:uniquekey /Pattern:”*.pst” /S /V:”c:\temp\pstIngestionFileServerHome.log”

Then I would have FilePath values in the CSV that looked like “FileServer/home/Jenny/Outlook Files/2009” (case sensitive).

Once you upload the mapping file the PST import from Azure to the Exchange mailbox (or Archive) starts. If the PST file cannot be found then you get an error in the management console at quite shortly after starting. The error reads as follows:

Could not find source file {0}. Please correct the FilePath column in the mapping file and create a new job with the updated mapping file

Full file path

fileserver/home/Jenny/outlook files/2009/Jenny2009.pst

In the above error I have purposely set the FilePath and PST file to the wrong case as that is the cause of this error (unless you did not upload the PST or the path is completely wrong). The best source of the FilePath name comes from the AzCopy log file (set in the /V switch for AzCopy). This will show the path (not including the string value used after “ingestiondata” in the Dest switch that you need to add), but will show the full path the file was uploaded to and the correct case for this path and file.

All the best with removing PST’s from the network! Of course there is more to do that just mentioned here – you need to find them, work out who the PST’s belong to and create this mapping file accurately. There are a number of PST ingestion software companies who will do this for you.

Getting Started with Office 365 Advanced Threat Protection

$
0
0

Announced a few months ago, Advanced Threat Protection became generally available on 1st June. I have been involved with trialling this product during the beta and so I thought I would note down a few thoughts on setting this up and what to expect now that it is publicly available.

Advanced Threat Protection is an add-on product to Exchange Online/Exchange Online Protection with its own subscription, so you will not see these features and products unless you have subscribed. Once you have subscribed you will get two new features in the Exchange Control Panel for Office 365. These are the ability to find malware containing attachments before a detection signature for that malware exists (zero-day malware attacks) and the ability to filter all hyperlinks in email via a known malicious links service (filtering against spear-phishing attacks). The feature to detect zero-day malware is called Safe Attachments and the feature to protect against spear-phishing is known as Safe Links.

Subscribing to Advanced Threat Protection

After signing into the Office 365 administration portal click Purchase Services on the left hand menu and locate your current Office 365 subscription that contains Exchange Online or Exchange Online Protection (Office 365 Enterprise E3 contains EOP, so you would look for your suite purchase if you did not have a standalone purchase of EOP). Your current subscriptions will contain the words Already Purchased underneath the item as shown:

image or image

In the two screenshots above you can see that you have no Exchange Online Advanced Threat Protection licences purchased. To add Advanced Threat Protection licences click the Add more link and enter the number of licences you want to purchase. You do not need to purchases the same number of licences as EOP or Exchange Online mailbox licences as you use the policy below to control who Advanced Threat Protection is available for. Advanced Threat Protection for volume licence customers is available from August 2015 and for non-profit/educational licences from later in the year. Once the purchase is confirmed the Advanced Threat’s menu entry appears in the Exchange Administration Console. Also don’t forget to assign a licence to the appropriate users in the Office 365 portal.

Safe Attachments

Safe Attachments in Advanced Threat Protection takes any email that meets the conditions of any one of the Safe Attachment policies that you create that also contains an attachment and checks this email for for malicious behaviour as it passes through Exchange Online Protection (EOP). Before an email is checked by Safe Attachments the attachment has already been scanned for known malware and viruses. So if the attachment contains malware that was not detected by an existing AV signature or if it is a safe attachment (no malware) then the email is routed to the Safe Attachments component in EOP. If the email does not contain any attachments it is routed to the users mailbox by way of the other EOP spam filtering features.

Once an email is considered to have cause to be checked by the Safe Attachments component of ATP the individual attachments in the message are placed inside a newly created Windows virtual machine that is spun up in ATP for the purposes of this service. The attachment is then executed or otherwise run (for example if it is a Word doc, it is opened in Word in the new VM that was created for it). The VM is then watched for behaviour that is considered to be unsafe. Examples of unsafe behaviour include setting certain known registry key locations (such as the RunOnce group of keys in Windows) or downloading malicious content from the internet. If the attachment does not exhibit that behaviour then the email is released and sent on to the user. If the email does exhibit these actions the email is not sent onward, and optionally a copy of the email in a form of a report is forwarded to an administrators mailbox (where care should be taken on opening the attachment).

The time it takes to spin up a new VM and execute the attachment is in the region of 7 to 10 minutes. Therefore anyone subject to a Safe Attachments policy will have emails that contain attachments delayed by at least this amount of time. Of course this delay is necessary to ensure that the recipient is not being sent malware that is currently not detected (zero-day attacks) and the impact of this delay needs to be considered against the benefit of the additional filtering that happens and the impact of that user executing the malware themselves on their own machine.

To protect a user with Safe Attachments you need to create a policy. This is done in the Exchange Admin Centre in Office 365 and the “advanced threats” area as shown:

SNAGHTML43a8f613

In the above screenshot I have a single policy created called “Protect Brian Only”. This would be an example where I wanted to protect those users whom I though where more likely to be subject to zero-day malware attacks – good examples would be highly targets accounts (CEO etc.), IT administrator/help desk accounts and of course the accounts of users who will click anything and so you are often cleaning up their PC! There is no default policy, so unless a user is protected by a policy that you the administrator create, they are not subject to the Safe Attachments feature.

As Advanced Threat Protection is an additional licence, only those users who are licenced should be included in any policy.

Opening the “Protect Brian Only” example policy above shows me three sets of options. These are:

SNAGHTML43aa903b SNAGHTML43b22229 SNAGHTML43aad2b3

The first page allows me to edit the name and description. The second page sets the policy (more on this below) and the final page sets who the policy applies to. In this example it applies to a single recipient who was selected from the list of users in Office 365, though it could be a list of more than one user or anyone with a given email domain or anyone in an already created group.

The policy setting allows me to do the following:

  • Scan attachment containing emails (with options to not do this scanning, scan and send onward to the user regardless of the result, block the emails containing bad attachments or replace the attachments with a notification but allow the contents of the email to go on through).
  • Redirect the attachment containing emails to an alternative email address and what address to use. This is great for seeing what is blocked and acting as a sort of reporting service. Warning – this email address will get malicious emails sent to it, handle with extreme care.
  • Finally, in the event of a timeout at EOP/ATP where the attachment cannot be scanned in 30 minutes, check this box to treat the attachment in the same way as malicious emails are treated. This is the default action.

In the mailbox of the intended recipient, if block or replace is selected in the policy then the user will not see the malicious attachment and therefore cannot accidently execute its contents.

In the mailbox of the email address used for the redirection, you will see messages such as follows:

image

Here you see a report email that contains the email that was detected as malicious. You can see the To: address (redacted in the graphic above) and that it was not sent to the intended recipient and that it should not be opened.

All in all, its a very simple and inexpensive way to protect the mailboxes of either all staff or those you consider subject to targeted malware such as CEO type staff and the IT department. Even if you do not redirect emails containing malicious attachments, you can report on the number and type of attachments that are blocked from the reporting console available from the image icon on the ATP toolbar. The following shows a 30 day report for my tenant (which has only a few live mailboxes protected). For data-points beyond 7 days old it will take a short while for the information on the report to be returned to you and you need to request that report from the provided link. For data-points under 7 days you can see the information in real-time. The grey background to report shows where the 7 day period is located. In the below screenshot the above malware can be see in the report as the single instance of an email that passed AV scanning successfully but was in fact a zero-day attack. The second screenshot below shows the type of malware attachments that ATP is blocking. From this we can see that the risk lies in maliciously crafted Excel and Word attachments.

SNAGHTML43c1954c SNAGHTML43ce425b

Safe Links

When an email is delivered to the end recipient, any technology that checks the target of any link in the email is prone to one large issue – the web page or attachment on the other side of the hyperlink in the email may be safe and okay to view at the time of delivery, but might not be at the time the user comes to open the email and then click the link. Being aware of users working, or at least email reading hours, and delivering emails outside this timeframe with links to websites that are okay at the time of delivery means the email passes any web site or download checks done by the email server.

Advanced Threat Protection’s Safe Links feature protects the user by rewriting the hyperlink in the email body so that the link is checked at the point of click and not the point of delivery. To do this the hyperlink is changed from the target to the Safe Links portal. Then when the user clicks the link, they are taken to the Safe Links portal and if the site is now on a block list, the user is blocked, but if the target of the link is fine they are sent a browser redirect to the original target. Note that this is not a proxy server – you do not connect to the target URL through the Safe Links portal, you just visit the Safe Links portal when you click the link and if the target is safe at point of click you are directed via your browser to the target (a client side redirect). If the target is not safe at point of click then an error page is displayed.

In the following screenshot is an email with a hyperlink in it. This link was received by me to my Safe Links protected account and it looks link it might be an attempt to download malware to my computer, but I am going to click the link anyway (in second screenshot I am hovering over the hyperlink):

image image

You can see from the above screenshot that the hyperlink takes the user first to https://na01.safelinks.protection.outlook.com/?url=targetURL&data=value&sData=otherValue. The na01 part of the URL will be regionally specific and so might read emea01 or apac01 etc. When the user clicks the link they go to region.safelinks.protection.outlook.com. In my case I see the following webpage:

image

Here I am told the page has been classified as malicious. I also have an option to continue anyway (and I can control if this setting appears for users or not) and an option to close the browser window.

If the hyperlink is not malicious at the point of click then I still go to the Safe Links portal (as it is the portal that checks the link at point of click), but then get redirected to the target URL. This can be seen in the following screenshot which shows the F12 developer tools enabled in the browser and the network trace screen shown at the bottom of the window:

image

You will see that the first line is the Safe Links portal and this take 0.75 second before being redirected with a HTTP 302 client side redirect to the target URL and then the rest of the objects on the target page (until I paused the trace).

So how do I set this all up? It is very similar to the Safe Attachments above in that we create a policy, and then any email that contains hyperlinks that is delivered to the end user after that users is added to a policy get rewritten.

First we go to the Advanced Threats area of the Exchange Administration Console:

SNAGHTMLeafbb84

Here you can see an existing policy. There are no policies by default. If I create a new policy I need to provide the following:

SNAGHTMLeb3664c

You can see from the screenshot that you need a name for the policy and whether or not a link is rewritten (policies with greater priority take precedence, so if a user is subject to two or more polices then only the higher priority policy takes effect, therefore you can use a policy to turn off link rewriting for a subset of users covered under a lower policy that enabled it for more users). Also you can disable link tracking and not to allow users to have the option to click through to the target URL. Link tracking allows you to report who clicked what link and not allowing users to click through disables the “Continue to this website (not recommended)” link on the Safe Links warning page.

You also have the ability to control URL’s that you do not want to rewrite, and rewriting will only happen for FQDN URL’s (that is those with dots in them) and not single name URL’s such as http://intranet.  This allows you to bypass redirection for sites you know are safe or are FQDN’s but are internal.

Finally you get to set who the policy applies to. You do not need to apply the policy to all users if you have not licenced all users, but you can set policy based on who the recipient is, what domain the recipient is in (all users in that domain) or a group (some users).

On the Mail Flow menu in Exchange Control Panel you can view a URL Trace of the links that users have clicked in the past 7 days. The report shows you the link clicked and if it was blocked or not. If the click through option is enabled, it will show if that was done as well. Only users in policies that track clicks will be reported. As report looks like the following:

SNAGHTMLfdf4592

Further Administration

To administer your Safe Links and Safe Attachments policy and rules via Remote PowerShell see http://www.c7solutions.com/2015/06/advanced-threat-protection-via-powershell

Advanced Threat Protection via PowerShell

$
0
0

I discussed the newly released Advanced Threat Protection product in Office 365 on my blog, and in this article I want to outline the cmdlets that can be used to set this product up from Remote PowerShell to Office 365.

To connect to Office 365 via PowerShell take a search on your favourite search engine – there are lots and lots of articles on doing this. Once you have a connection to Exchange Online and you have purchased the Exchange Online Advanced Threat Protection product, you can use PowerShell to do your administration and report gathering.

The cmdlets you can use are for Safe Links are:

Disable-SafeLinksRule
Enable-SafeLinksRule
Get-SafeLinksPolicy
Get-SafeLinksRule
New-SafeLinksPolicy
New-SafeLinksRule
Remove-SafeLinksPolicy
Remove-SafeLinksRule
Set-SafeLinksPolicy
Set-SafeLinksRule

And the cmdlets you can use for Safe Attachments are:

Disable-SafeAttachmentRule
Enable-SafeAttachmentRule
Get-SafeAttachmentPolicy
Get-SafeAttachmentRule
New-SafeAttachmentPolicy
New-SafeAttachmentRule
Remove-SafeAttachmentPolicy
Remove-SafeAttachmentRule
Set-SafeAttachmentPolicy
Set-SafeAttachmentRule

And for reporting, you can run Get-AdvancedThreatProtectionTrafficReport to report on the number of attachments blocked and the type of notification sent when looking at Safe Attachments. Get-UrlTrace does the same report for Safe Links.

The cmdlet *-SafeLinksPolicy and *-SafeAttachmentPolicy controls the policy. Every rule needs to be associated with a policy and so a policy needs creating first:

New-SafeLinksPolicy “Protect C7 Solutions Users”

Will create a Safe Link policy with the default settings. This includes no URL tracking, no click through and is not enabled. A better start might be

New-SafeLinksPolicy “Protect C7 Solutions Users” -TrackClicks $true -IsEnabled $true -AllowClickThrough $false

Once a policy is created, a rule can be added to that policy. The *-SafeLinksRule and *-SafeAttachmentRule cmdlets control this in the shell. You can only have one rule per policy. An example cmdlet to create a rule would be:

New-SafeLinksRule “Protect C7 Solutions Users” -SafeLinksPolicy “Protect C7 Solutions Users” -RecipientDomainIs “c7solutions.com” -Enabled $true

Note that the –SafeLinksPolicy value matches that of the name of the previously created policy when making the rule.

To create a Safe Attachment policy and rule that protect all users by blocking malicious attachments and sending a report to an external mailbox you could use:

New-SafeAttachmentPolicy “Protect C7 Solutions Users” -Enable $true -Redirect $true -RedirectAddress brian@contoso.com –Action Block

New-SafeAttachmentRule “Protect C7 Solutions Users” -RecipientDomainIs “c7solutions.com” -SafeAttachmentPolicy “Protect C7 Solutions Users” -Enabled $true

The other cmdlets are self explanatory with regard to Enable- and Disable- and Set- and Remove-. The advantage of using PowerShell to administer Safe Links and Safe Attachments is you can set up a policy in a lab and then copy it to a production environment or enable the same policy on many different tenants if you are a Microsoft Partner with customers interested in this advanced protection of their mailbox.

Unable To Send Exchange Quota Message

$
0
0

In Exchange 2013 you can sometimes see the following event log error (MSExchange Store Driver Submission, ID 1012):

The store driver failed to submit event <id> mailbox <guid> MDB <database guid> and couldn’t generate an NDR due to exception Microsoft.Exchange.MailboxTransport.StoreDriverCommon.InvalidSenderException
   at Microsoft.Exchange.MailboxTransport.Shared.SubmissionItem.SubmissionItemUtils.CopySenderTo(SubmissionItemBase submissionItem, TransportMailItem message)
   at Microsoft.Exchange.MailboxTransport.Submission.StoreDriverSubmission.MailItemSubmitter.GenerateNdrMailItem()
   at Microsoft.Exchange.MailboxTransport.Submission.StoreDriverSubmission.MailItemSubmitter.<>c__DisplayClass1.<FailedSubmissionNdrWorker>b__0()
   at Microsoft.Exchange.MailboxTransport.StoreDriverCommon.StorageExceptionHandler.RunUnderTableBasedExceptionHandler(IMessageConverter converter, StoreDriverDelegate workerFunction).

And this will be preceded by the following event log warning (MSexchangeIS, ID 1077):

The mailbox <guid> on database <database guid> is approaching its storage limit. A notification has been sent to the user. This warning will not be sent again for at least twenty four hours.

The mailbox in both errors is the same and it occurs for mailboxes that have moved to Exchange Server 2013 from Exchange Server 2010 and are close to their mailbox quota. To fix the issue move the mailbox to a different database. The easiest way to do this is New-MoveRequest <guid> where the same GUID is used.

If you have lots of these then this is a little more time consuming, unless you get PowerShell to the rescue.

The following two cmdlets will query the last seven days of the event logs for MSexchangeIS sourced events with ID 1077, get the event log message (which contains the mailbox guid), manipulate the string containing the message and generate a text file of just the mailbox guids. The second cmdlet will run a New-MoveRequest for each mailbox listed in the text file.

Get-WinEvent -ComputerName PC1 -ProviderName MSExchangeIS | where {$_.ID -eq 1077 -AND $_.TimeCreated -gt [DateTime]::Now.AddDays(-7).Date} | select @{Name="mailbox";Expression={$_.Message.Substring(12,36)}} | ft -HideTableHeaders -AutoSize | out-file nearquota.txt

and then

Get-Content .\nearquota.txt | foreach {New-MoveRequest -Identity $_}

Make sure though that your Application event log is large enough to store more than seven days of events and then run these cmdlets, per server every seven days until the issue goes away (or over the course of say a year, move all mailboxes to different databases and that fixes it as well).

Office 365 MDM (Mobile Device Management) From A Users Perspective

$
0
0

The following list of steps and screenshots are taken during the enrolment process to add an iPhone to Office 365 once the free MDM solution that comes with Office 365 is enabled for a user.

Step Details Image

1.

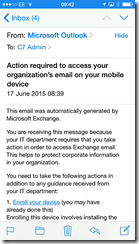
Once your IT Administrator enables MDM for your Office 365 account you will get the following email on your device if you already have email configured. It may take 24 hours from the admin configuring MDM for this to arrive. Once this email arrives no further email will arrive from that account any device until the devices are enrolled with the company for management.

01 Initial Email

2.

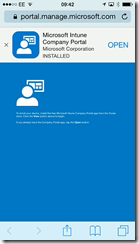
Click “Enrol your device” link in Step 1 of the email. This will take you to the relevant app store of your device to install the Company Portal (iPhone as shown and Android devices). Windows Phone users will see the Workplace Join settings (not shown)
In this example, the Company Portal app is already installed so we can click Open at the top. Most users will need to install this free app from the page they see in the App Store.
02 Clicking Enroll
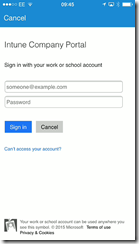
3. You are required to login. Enter your Office 365 username.
Upon entering your username you will either be directed to your network to login (if your company uses AD FS to login) or you enter the password here. Step 4 shows the AD FS login page, which will probably have your company logo on it.
If your IT department does not use AD FS you enter your password here (the page will wait for you to enter it)
03 Login Page
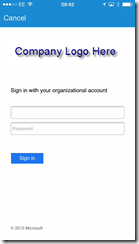
4. This is an example AD FS login page with company logo. If you are required to login with other information as well as your password you will be prompted for this as well. 04 ADFS Login Page
5. Upon login being successful your device will start the enrolment process by connecting to both Office 365 and the device manufacturer to download required secure management info. 05 Enrolling
6. Click Enroll to start the process.

The company you are enrolling your phone into will have some rights over some of the data on your phone – for example they will be able to remove the work email account from it if you leave the company.

Enrolment conditions will be enforced based on your companies requirement for using phones to access company data, for example a PIN number of a minimum length (see http://bit.ly/o365mdm for more on this)

06 Notice About Enrolling
7. Enrolment goes through a series of steps with the screen changing a few times automatically. Within a seconds you end up at the “Install” screen. Click Install to add the management profile for the displayed company here. 07 Certificate 1
8. A unique encryption key is generated for your device 08 Key Generation 1
9. You need to click install at the personal settings screen 09 Warning
10. You need to confirm that you trust this company for remote management of your device 10 Install Trust
11. The management profile is installed and you can click Done. 11 Profile Installed
12. Device checks that it is enrolled and what the device settings are and if these settings are compatible with the companies required restrictions on the device. 12 Checking
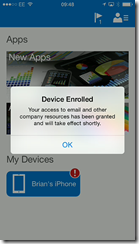
13. Enrolment is confirmed. Notice that my device(s) are displayed and my current device is not compliant with company policy (the red exclamation mark) 13 Enrolled
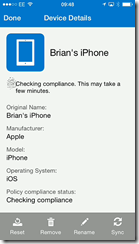
14. Clicking my device in the Company Portal app shows the compliance status of the device. Here the device is still checking compliance 14 Checking Compliance 1st Time
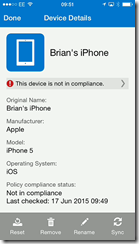
15 And here the device is shown not to be compliant. 15 Not In Compliance
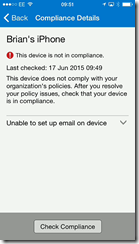
16 Details on compliance state are shown when clicking the “This device is not in compliance” message.

Further details on the compliance failure are shown under the message. In this case the device is unable to set up an email profile on the device.

16 Not In Compliance Details
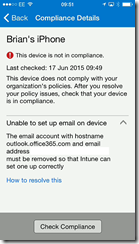
17 Clicking the “Unable to set up email on the device” message shows the full details. In this case the device already has an email profile configured and for the iPhone this needs to be removed and the Company Portal will recreate it. It is this recreated email profile that the iPhone/iPad can manage.

Android and Windows Phone users do not need to delete their email profile and have the device recreate it.

17 Actual Reason for not in compliance
18 For the iPhone/iPad the steps to delete the existing profile are Settings > Mail, Contacts, Calendars > Click the email profile > click Delete Account 18 Deleting original email profile
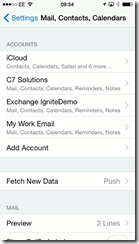
19 Once the account is deleted it is not visible in the list of email accounts.

In this example the iCloud account remains along with two Exchange / Office 365 accounts that are not managed by MDM. You can only have one MDM managed account per device at any given time.

Other compliance settings may be required such as a PIN number. You have 60 minutes to enabled this if required.

19 Seeing list of email profiles - work email is gone
20 Once the Company App checks for compliance again, a new email profile for your work appears. Clicking it (called “Office 365 email”) requires entry of your password. 20 Work Email Profile Arrives
21 You then see the email profile created. Compare this to the image in Step 19 for the difference. 21 Email Configured Automatically
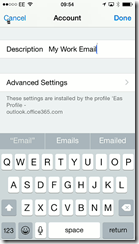
22 It is possible to rename the email profile. In this case it is via Settings > Email, Contacts, Calendars > Office 365 email > Account and then change the “Description” value 22 Renaming Email Profile
23 Updated email profile listed 23 Email Profile listed
24 Email should now sync with your device again. Notice that the email about needing to set up MDM is now missing and has been removed automatically 24 Email available on device, enrollment email not available now
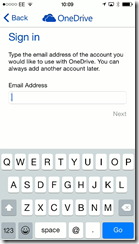
25 Now that the device is compliant (excepting the PIN number, which gives you 60 minutes of grace to complete this step) you can start other Office 365 aware applications. Here we are going to sign into OneDrive and show our OneDrive for Business data 25 Other Apps
26 Your app requires a login 26 Login for other apps
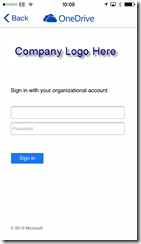
27 Which if you have an AD FS additional login you may also see 27 ADFS Login
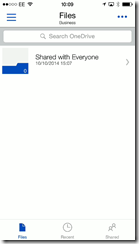
28 Your other app is now working, and in the case of OneDrive for Business did not need configuring 28 Other App Also Working

Configuring Writeback Permissions in Active Directory for Azure Active Directory Sync

$
0
0

Azure Active Directory has been long the read-only cousin of Active Directory for those Office 365 and Azure users who sync their directory from Active Directory to Azure Active Directory apart from eight attributes for Exchange Server hybrid mode. Not any more. Azure Active Directory writeback is now available and in preview for some of the writeback types at the time of writing. This enabled objects to be mastered or changed in Azure Active Directory and written back to on-premises Active Directory.

This writeback includes:

  • Devices that can be enrolled with Office 365 MDM or Intune, which will allow login to AD FS controlled resources based on user and the device they are on
  • “Modern Groups” in Office 365 can be written back to on-premises Exchange Server 2013 CU8 or later hybrid mode and appear as mail enabled distribution lists on premises. Does not require AAD Premium licences
  • Users can change their passwords via the login page or user settings in Office 365 and have that password written back online.
  • Exchange Server hybrid writeback is the classic writeback from Azure AD and is the apart from Group Writeback is the only one of these writebacks that does not require Azure AD Premium licences.
  • User writeback from Azure AD (i.e. users made in Office 365 in the cloud for example) to on-premises Active Directory
  • Windows 10 devices for “Azure AD Domain Join” functionality

All of these features (apart from Exchange Hybrid writeback) require AADSync and not DirSync. Install and run the AADConnect program to migrate from DirSync to AADSync and then in the Synchronization Options on rerunning the AADConnect wizard you can add all these writeback functions.

Preparing for Device Writeback

If you do not have a 2012 R2 or later domain controller then you need to update the schema of your forest. Do this by getting a Windows Server 2012 R2 ISO image and mounting it as a drive. Copy the support/adprep folder from this image or DVD to a 64 bit domain member in the same site as the Schema Master. Then run adprep /forestprep from an admin cmd prompt when logged in as a Schema Admin. The domain member needs to be a 64 bit domain joined machine for adprep.exe to run.

Wait for the schema changes to replicate around the network.

Import the cmdlets needed to configure your Active Directory for writeback by running Import-Module ‘C:\Program Files\Microsoft Azure Active Directory Connect\AdPrep\AdSyncPrep.psm1′ from an administrative PowerShell session. You need Azure AD Global Admin and Enterprise Admin permissions for Azure and local AD forest respectively. The cmdlets for this are obtained by running the Azure AD Connect tool.


$accountName = "domain\aad_account" #[this is the account that will be used by Azure AD Connect Sync to manage objects in the directory, this is an account in the form of AAD_number].
Initialize-ADSyncDeviceWriteBack -AdConnectorAccount $accountName -DomainName contoso.com #[domain where devices will be created].

This will create the “Device Registration Services” node in the Configuration partition of your forest as shown:

image

To see this, open Active Directory Sites and Services and from the View menu select Show Services Node. Also in the domain partition you should now see an OU called RegisteredDevices. The AADSync account now has permissions to write objects to this container as well.

In Azure AD Connect, if you get the error “This feature is disabled because there is no eligible forest with appropriate permissions for device writeback” then you need to complete the steps in this section and click Previous in the AADConnect wizard to go back to the “Connect your directories” page and then you can click Next to return to the “Optional features” page. This time the Device Writeback option will not be greyed out.

Device Writeback needs a 2012 R2 or later AD FS server and WAP to make use of the device info in the Active Directory (for example, conditional access to resources based on the user and the device they are using). Once Device Writeback is prepared for with these cmdlets and the AADConnect Synchronization Options page is enabled for Device Writeback then the following will appear in Active Directory:

image

Not shown in the above, but adding the Display Name column in Active Directory Users and Computers tells you the device name. The registered owner and registered users of the device are available to view, but as they are SID values, they are not really readable.

Preparing for Group Writeback

Writing Office 365 “Modern Groups” back to Active Directory on-premises requires Exchange Server 2013 CU8 or later schema updates and servers installed. To create the OU and permissions required for Group Writeback you need to do the following.

Import the cmdlets needed to configure your Active Directory for writeback by running Import-Module ‘C:\Program Files\Microsoft Azure Active Directory Connect\AdPrep\AdSyncPrep.psm1′ from an administrative PowerShell session. You need Domain Admin permissions for the domain in the local AD forest that you will write back groups to. The cmdlets for this are obtained by running the Azure AD Connect tool.

$accountName = "domain\aad_account" #[this is the account that will be used by Azure AD Connect Sync to manage objects in the directory, this is an account usually in the form of AAD_number].
$cloudGroupOU = "OU=CloudGroups,DC=contoso,DC=com"
Initialize-ADSyncGroupWriteBack -AdConnectorAccount $accountName -GroupWriteBackContainerDN $cloudGroupOU

Once these cmdlets are run the AADSync account will have permissions to write objects to this OU. You can view the permissions in Active Directory Users and Computers for this OU if you enable Advanced mode in that program. There should be a permission entry for this account that is not inherited from the parent OU’s.

At the time of writing, the distribution list that is created on writeback from Azure AD will not appear in the address book. To add it to the address book in Outlook etc. run Update-AddressList in Exchange Server. Once group writeback is prepared for using these cmdlets here and AADConnect has had it enabled during the Synchronization Options page, you should see the groups appearing in the selected OU as shown:

image

Preparing for Password Writeback

The option for users to change their passwords in the cloud and have then written back to on-premises (with multifactor authentication and proof of right to change the password) is also available in Office 365 / Azure AD with the Premium Azure Active Directory or Enterprise Mobility Pack licence. To set the permissions on-premises for the passwords to be written back the following script is needed:

$passwordOU = "DC=contoso,DC=com" #[you can scope this down to a specific OU]
$accountName = "domain\aad_account" #[this is the account that will be used by Azure AD Connect Sync to manage objects in the directory, this is an account usually in the form of AAD_number].

$cmd = "dsacls.exe '$passwordOU' /I:S /G '`"$accountName`":CA;`"Reset Password`";user'"
Invoke-Expression $cmd

$cmd = "dsacls.exe '$passwordOU' /I:S /G '`"$accountName`":CA;`"Change Password`";user'"
Invoke-Expression $cmd

Preparing for Exchange Server Hybrid Writeback

Hybrid mode in Exchange Server requires the writing back on eight attributes from Azure AD to Active Directory. The list of attributes written back is found here. The following script will set these permissions for you in the OU you select (or as shown at the root of the domain). The DirSync tool used to do all this permissioning for you, but the AADSync tool does not. Therefore scripts such as this are required. This script sets lots of permissions on these eight attributes, but for clarify on running the script the output of the script is sent to Null. Remove the “| Out-Null” from the script to see the changes as they occur (the script also takes a lot longer to run).

$accountNameName = "domain\aad_account"
$HybridOU = "DC=contoso,DC=com"

#Object type: user
$cmd = "dsacls '$HybridOU' /I:S /G '`"$accountName`":WP;proxyAddresses;user'"
Invoke-Expression $cmd | Out-Null
$cmd = "dsacls '$HybridOU' /I:S /G '`"$accountName`":WP;msExchUCVoiceMailSettings;user'"
Invoke-Expression $cmd | Out-Null
$cmd = "dsacls '$HybridOU' /I:S /G '`"$accountName`":WP;msExchUserHoldPolicies;user'"
Invoke-Expression $cmd | Out-Null
$cmd = "dsacls '$HybridOU' /I:S /G '`"$accountName`":WP;msExchArchiveStatus;user'"
Invoke-Expression $cmd | Out-Null
$cmd = "dsacls '$HybridOU' /I:S /G '`"$accountName`":WP;msExchSafeSendersHash;user'"
Invoke-Expression $cmd | Out-Null
$cmd = "dsacls '$HybridOU' /I:S /G '`"$accountName`":WP;msExchBlockedSendersHash;user'"
Invoke-Expression $cmd | Out-Null
$cmd = "dsacls '$HybridOU' /I:S /G '`"$accountName`":WP;msExchSafeRecipientsHash;user'"
Invoke-Expression $cmd | Out-Null

#Object type: group
$cmd = "dsacls '$HybridOU' /I:S /G '`"$accountName`":WP;proxyAddresses;group'"
Invoke-Expression $cmd | Out-Null

#Object type: contact
$cmd = "dsacls '$HybridOU' /I:S /G '`"$accountName`":WP;proxyAddresses;contact'"
Invoke-Expression $cmd | Out-Null

Preparing for User Writeback

Currently in preview at the time of writing, you are able to make users in Azure Active Directory (cloud users as Office 365 would call them) and write them back to on-premises Active Directory. The users password is not written back and so needs changing before the user can login on-premises.

To prepare the on-premises Active Directory to writeback user objects you need to run this script. This is contained in AdSyncPrep.psm1 and that is installed as part of Azure AD Connect. Azure AD Connect will install Azure AD Sync, which is needed to do the writeback. To load the AdSyncPrep.psm1 module into PowerShell run Import-Module ‘C:\Program Files\Microsoft Azure Active Directory Connect\AdPrep\AdSyncPrep.psm1′ from an administrative PowerShell session.

$accountName = "domain\aad_account" #[this is the account that will be used by Azure AD Connect Sync to manage objects in the directory, this is an account usually in the form of AAD_number].
$cloudUserOU = "OU=CloudUsers,DC=contoso,DC=com"
Initialize-ADSyncUserWriteBack -AdConnectorAccount $accountName -UserWriteBackContainerDN $cloudUserOU

Once the next AADSync occurs you should see users in the OU used above that match the cloud users in Office 365 as shown:

image

Prepare for Windows 10 BYOD

Windows 10 devices can “domain join” Azure Active Directory and be written back to the on-premises Active Directory.

The AdSyncPrep.psm1 module supports the following two additional cmdlets to prepare your Active Directory for Windows 10 device writeback:

Initialize-ADSyncDomainJoinedComputerSync
Initialize-ADSyncNGCKeysWriteBack

These cmdlets are run as follows:

$accountName = "domain\aad_account" #[this is the account that will be used by Azure AD Connect Sync to manage objects in the directory, this is an account usually in the form of AAD_number].
$azureAdCreds = Get-Credential #[Azure Active Directory administrator account]

Initialize-ADSyncDomainJoinedComputerSync -AdConnectorAccount $accountName -AzureADCredentials $azureAdCreds
Initialize-ADSyncNGCKeysWriteBack -AdConnectorAccount $accountName

Once complete, open Active Directory Sites and Services and from the View menu Show Services Node. Then you should see the GUID of your domain under the Device Registration Configuration container.

image


Password Writeback Errors

$
0
0

I had been struggling with password writeback testing and was coming across the following set of errors, and found that searching for them uncovered nothing online. So I wrote this blog to remind me and help you solve these issues. These errors are all visible in the Application log of the Event Viewer.

User Restrictions

The following error is because the user has “user cannot change password” option set in Active Directory:

EventID 33004: TrackingId: 7344da2c-ab9d-42ef-adea-4a17d07fdeb9, Reason: Synchronization Engine returned an error hr=80230626, message=The password could not be updated because the management agent credentials were denied access., Context: cloudAnchor: User_9b83f544-ba22-4ffb-bff5-c1c2374d654c, SourceAnchorValue: F39SWQrM2EidaboN8UC8Ww==, UserPrincipalName: ethan@contoso.co.uk, Details: Microsoft.CredentialManagement.OnPremisesPasswordReset.Shared.PasswordResetException: Synchronization Engine returned an error hr=80230626, message=The password could not be updated because the management agent credentials were denied access.
   at AADPasswordReset.SynchronizationEngineManagedHandle.ThrowSyncEngineError(Int32 hr)
   at AADPasswordReset.SynchronizationEngineManagedHandle.ChangePassword(String cloudAnchor, String sourceAnchor, String oldPassword, String newPassword)
   at Microsoft.CredentialManagement.OnPremisesPasswordReset.PasswordResetCredentialManager.ChangePassword(String encryptedChangePasswordRequestString, String publicKeyEncryptedSymmetricKey, String publicKeyEncryptedSymmetricIV)

And also, as the second error generated:

Event ID 6329: An unexpected error has occurred during a password set operation.
“BAIL: MMS(5716): ..\server.cpp(11139): 0x80230626 (The password could not be updated because the management agent credentials were denied access.)
Azure AD Sync 1.0.8641.0″

image

Group Policy Restrictions

Its possible that the errors you see for password writeback in the application log are due to restrictions on the user’s password that they have chosen. If the password is not complex enough then you get a warning in the password reset page the user is visiting in Azure, but you can also get this is a Group Policy restriction is in place even if you have set a strong password. The text in the error message in the Azure password change portal reads “This password does not meet your corporate password policy. Please make sure to use a mix of upper and lowercase letters, numbers, symbols, and to update your password to one that you haven’t used previously.”. Therefore though Azure accepted the passwords (original and new) the on-premises server rejected them with the following:

Event ID 33008: TrackingId: 3c8c78dc-9167-4286-9384-e2f0e777af87, Reason: Synchronization Engine returned an error hr=80230619, message=A restriction prevents the password from being changed to the current one specified., Context: cloudAnchor: User_9b83f544-ba22-4ffb-bff5-c1c2374d654c, SourceAnchorValue: F39SWQrM2EidaboN8UC8Ww==, UserPrincipalName: ethan@contoso.co.uk, Details: Microsoft.CredentialManagement.OnPremisesPasswordReset.Shared.PasswordResetException: Synchronization Engine returned an error hr=80230619, message=A restriction prevents the password from being changed to the current one specified.
   at AADPasswordReset.SynchronizationEngineManagedHandle.ThrowSyncEngineError(Int32 hr)
   at AADPasswordReset.SynchronizationEngineManagedHandle.ChangePassword(String cloudAnchor, String sourceAnchor, String oldPassword, String newPassword)
   at Microsoft.CredentialManagement.OnPremisesPasswordReset.PasswordResetCredentialManager.ChangePassword(String encryptedChangePasswordRequestString, String publicKeyEncryptedSymmetricKey, String publicKeyEncryptedSymmetricIV)

and

Event ID 6329: An unexpected error has occurred during a password set operation.
“BAIL: MMS(5236): ..\server.cpp(11139): 0x80230619 (A restriction prevents the password from being changed to the current one specified.)
Azure AD Sync 1.0.8641.0″

This of course seems self explanatory – your password is not complex enough for your rules on-premises but complex enough to get past the Azure initial checks that it imposes.

image

This error though is especially annoying in test scenarios where you have turned off all the complexity checks. To test why you are getting this error, first check its a password change error and not something else, and try and change the users password on-premises. You should get the same restriction. Then use the cmd prompt to check the password settings for the user.

</p> <p>net user username /domain</p> <p>

This will report the following:

User name                    user1
Full Name                    First Last
Comment
User’s comment
Country/region code          000 (System Default)
Account active               Yes
Account expires              Never

Password last set            7/7/2015 3:19:00 PM
Password expires             Never
Password changeable          7/8/2015 3:19:00 PM
Password required            Yes
User may change password     Yes

Workstations allowed         All
Logon script
User profile
Home directory
Last logon                   7/8/2015 10:31:05 AM

Logon hours allowed          All

Local Group Memberships
Global Group memberships     *Domain Users
The command completed successfully.

image

In this example, notice the highlighted. Here there password minimum age requirement in Group Policy has been removed:

image

But the domain controller (after running gpupdate to force the change to the domain controller) still enforces a single day to allow the change to occur.

For test scenarios, modify group policy to 0 days (rather than not defined) and probably increase the max age from the suggested default of 30 days:

image

After running gpupdate, you get the following for the net user command:

Password last set            7/8/2015 10:42:05 AM
Password expires             Never
Password changeable          7/8/2015 10:42:05 AM

Now you should be able to change your password in Azure against an on-premises user.

Strong Password Required

In the password change portal, the user is required to enter a strong password regardless of any restrictions that you have on-premises. So even if you are testing and have removed all history and complex and renewal requirements for the password, Azure will ensure that a strong password of 7 or more characters is entered regardless of your on-premises policy. In fact, Azure does not know your on-premises policy for password restrictions and enforces its own in addition to the one you have.

You get errors in the portal that read “Strong password required. Combine at least three of the following: uppercase letters, lowercase letters, numbers, and symbols.”. You also cannot reset the password to the same and the errors you get look like the following options:

image image image image 

Success

For completion of the blog, here is what you should see in the event log when it is working:

Event ID 31006: TrackingId: f430189d-984c-41d5-a4a6-333c66ffae1f, ChangePasswordRequestStart, Details: ethan@contosochemists.co.uk

Event ID 31007: TrackingId: f430189d-984c-41d5-a4a6-333c66ffae1f, ChangePasswordSuccess, Details: Context: cloudAnchor: User_9b83f544-ba22-4ffb-bff5-c1c2374d654c, SourceAnchorValue: F39SWQrM2EidaboN8UC8Ww==, UserPrincipalName: ethan@contosochemists.co.uk

Unable To Send Exchange Quota Message

$
0
0

In Exchange 2013 you can sometimes see the following event log error (MSExchange Store Driver Submission, ID 1012):

The store driver failed to submit event <id> mailbox <guid> MDB <database guid> and couldn’t generate an NDR due to exception Microsoft.Exchange.MailboxTransport.StoreDriverCommon.InvalidSenderException
   at Microsoft.Exchange.MailboxTransport.Shared.SubmissionItem.SubmissionItemUtils.CopySenderTo(SubmissionItemBase submissionItem, TransportMailItem message)
   at Microsoft.Exchange.MailboxTransport.Submission.StoreDriverSubmission.MailItemSubmitter.GenerateNdrMailItem()
   at Microsoft.Exchange.MailboxTransport.Submission.StoreDriverSubmission.MailItemSubmitter.<>c__DisplayClass1.<FailedSubmissionNdrWorker>b__0()
   at Microsoft.Exchange.MailboxTransport.StoreDriverCommon.StorageExceptionHandler.RunUnderTableBasedExceptionHandler(IMessageConverter converter, StoreDriverDelegate workerFunction).

And this will be preceded by the following event log warning (MSexchangeIS, ID 1077):

The mailbox <guid> on database <database guid> is approaching its storage limit. A notification has been sent to the user. This warning will not be sent again for at least twenty four hours.

The mailbox in both errors is the same and it occurs for mailboxes that have moved to Exchange Server 2013 from Exchange Server 2010 and are close to their mailbox quota. To fix the issue move the mailbox to a different database. The easiest way to do this is New-MoveRequest <guid> where the same GUID is used.

If you have lots of these then this is a little more time consuming, unless you get PowerShell to the rescue.

The following two cmdlets will query the last seven days of the event logs for MSexchangeIS sourced events with ID 1077, get the event log message (which contains the mailbox guid), manipulate the string containing the message and generate a text file of just the mailbox guids. The second cmdlet will run a New-MoveRequest for each mailbox listed in the text file.

Get-WinEvent -ComputerName PC1 -ProviderName MSExchangeIS | where {$_.ID -eq 1077 -AND $_.TimeCreated -gt [DateTime]::Now.AddDays(-7).Date} | select @{Name="mailbox";Expression={$_.Message.Substring(12,36)}} | ft -HideTableHeaders -AutoSize | out-file nearquota.txt

and then

Get-Content .\nearquota.txt | foreach {New-MoveRequest -Identity $_}

Make sure though that your Application event log is large enough to store more than seven days of events and then run these cmdlets, per server every seven days until the issue goes away (or over the course of say a year, move all mailboxes to different databases and that fixes it as well).

Office 365 MDM (Mobile Device Management) From A Users Perspective

$
0
0

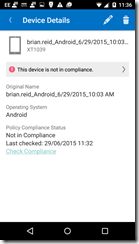
The following list of steps and screenshots are taken during the enrolment process to add an iPhone and an Android phone to Office 365 once the free MDM solution that comes with Office 365 is enabled for the user.

Step Details Image from iPhone Image from Android

1.

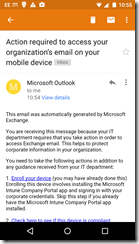
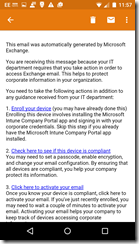
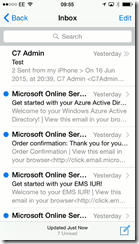
Once your IT Administrator enables MDM for your Office 365 account you will get the following email on your device if you already have email configured. It may take 24 hours from the admin configuring MDM for this to arrive. Once this email arrives no further email will arrive from that account any device until the devices are enrolled with the company for management.

01 Initial Email Screenshot_2015-06-29-10-55-47

2.

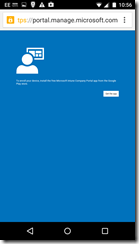
Click “Enrol your device” link in Step 1 of the email. This will take you to the relevant app store of your device to install the Company Portal (iPhone as shown and Android devices). Windows Phone users will see the Workplace Join settings (not shown)
In the iOS example, the Company Portal app is already installed so we can click Open at the top.

For Android to the right, it shows that the app needs installing from the page they see in the App Store.

02 Clicking Enroll Screenshot_2015-06-29-10-56-20
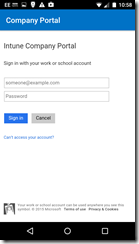
3. Once the app is installed you are required to login. Enter your Office 365 username.
Upon entering your username you will either be directed to your network to login (if your company uses AD FS to login) or you enter the password here. Step 4 shows the AD FS login page, which will probably have your company logo on it.
If your IT department does not use AD FS you enter your password here (the page will wait for you to enter it)
03 Login Page Screenshot_2015-06-29-10-58-51
4. This is an example AD FS login page with company logo. If you are required to login with other information as well as your password you will be prompted for this as well. 04 ADFS Login Page  
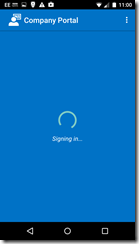
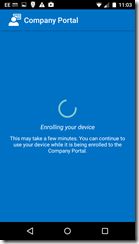
5. Upon login being successful your device will start the enrolment process by connecting to both Office 365 and the device manufacturer to download required secure management info. 05 Enrolling Screenshot_2015-06-29-11-00-07
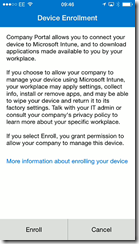
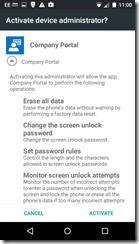
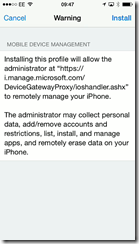
6. For iOS click Enroll to start the process. For Android you need to click Activate.

The company you are enrolling your phone into will have some rights over some of the data on your phone – for example they will be able to remove the work email account from it if you leave the company.

Enrolment conditions will be enforced based on your companies requirement for using phones to access company data, for example a PIN number of a minimum length (see http://bit.ly/o365mdm for more on this)

06 Notice About Enrolling Screenshot_2015-06-29-11-00-55
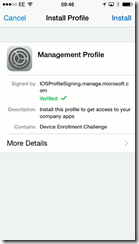
7. Enrolment goes through a series of steps with the screen changing a few times automatically. Within a seconds you end up at the “Install” screen. Click Install to add the management profile for the displayed company here.

Android and Windows Phone have less steps to go through.

07 Certificate 1 Screenshot_2015-06-29-11-03-50
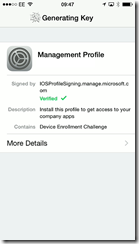
8. A unique encryption key is generated for your device when using iOS devices.

For Android, you need to accept the compliance requirements configured by your administrator. If you do not complete these requirements then business applications will not be available on the device.

08 Key Generation 1 Screenshot_2015-06-29-11-20-47
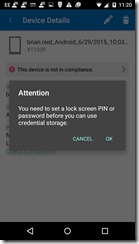
9. You need to click install at the personal settings screen when using iOS devices.

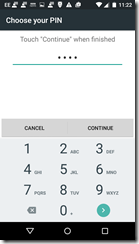
For Android, once compliance requirements are set (in this case a PIN number is entered). Note that for iOS, you have 1 hour to enter a PIN number to become compliant, but not for the Android.

09 Warning Screenshot_2015-06-29-11-22-49
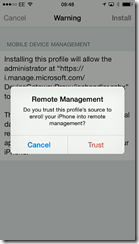
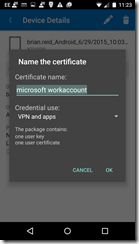
10. You need to confirm that you trust this company for remote management of your device when using iOS devices.

For Android you need to name and install the certificate.

10 Install Trust Screenshot_2015-06-29-11-23-05
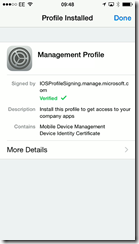
11. The management profile is installed and you can click Done when using iOS devices. 11 Profile Installed  
12. Device checks that it is enrolled and what the device settings are and if these settings are compatible with the companies required restrictions on the device.

On Android you may get a prompt about entering a PIN number or other compliance requirements if you did not enter them earlier

12 Checking  
13. Enrolment is confirmed. Notice that my device(s) are displayed and my current device is not compliant with company policy (the red exclamation mark).

For Android devices, the My Devices tab will show your devices, including if there are any compliance issues.

13 Enrolled  
14. Clicking my device in the Company Portal app shows the compliance status of the device. Here the device is still checking compliance 14 Checking Compliance 1st Time  
15 And here the device is shown not to be compliant.

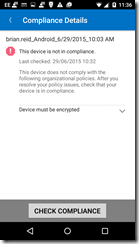
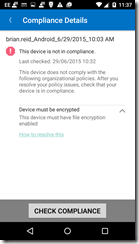
For Android devices not in compliance, it shows an Enrollment update available (if you did not meet compliance requirements during the Company App enrollment process) or if you are not compliance (for example device is not encrypted) then it will show that the device is not in compliance as shown.

15 Not In Compliance Screenshot_2015-06-29-11-36-13
16 Details on compliance state is iOS shows the “This device is not in compliance” message.

Further details on the compliance failure are shown under the message. In this case the iOS device is unable to set up an email profile on the device and the Android devices need a longer password and device encryption

16 Not In Compliance Details Screenshot_2015-06-29-11-36-27
17 Clicking the “Unable to set up email on the device” message shows the full details. In this case the device already has an email profile configured and for the iPhone this needs to be removed and the Company Portal will recreate it. It is this recreated email profile that the iPhone/iPad can manage.

Android and Windows Phone users do not need to delete their email profile and have the device recreate it but Compliance requirements must still be met.

17 Actual Reason for not in compliance Screenshot_2015-06-29-11-37-47
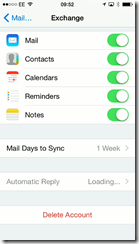
18 For the iPhone/iPad the steps to delete the existing profile are Settings > Mail, Contacts, Calendars > Click the email profile > click Delete Account

For Android, if the device is compliant in the Company App then you need to check Exchange Server to validate this for you so that your email continues to work. Back in the email program view the enrollment email as shown – click hyperlink #2 in the email and sign into the web based Device portal

18 Deleting original email profile Screenshot_2015-06-29-11-57-54
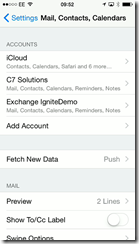
19 Once the account is deleted on the iOS device it is not visible in the list of email accounts.

In this example the iCloud account remains along with two Exchange / Office 365 accounts that are not managed by MDM. You can only have one MDM managed account per device at any given time.

Other compliance settings may be required such as a PIN number. You have 60 minutes in iOS to enable this if required.

19 Seeing list of email profiles - work email is gone  
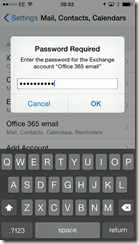
20 Once the Company App checks for compliance again and if you are compliant, a new email profile for your work appears. Clicking it (called “Office 365 email”) requires entry of your password.

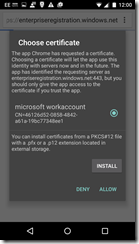
In Android, once the device is shown as compliant in #2 of the email, click the hyperlink for #3 in the email. Click Allow on the certificate prompt if you see one.

20 Work Email Profile Arrives Screenshot_2015-06-29-12-00-26
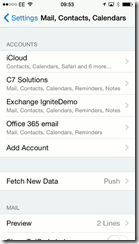
21 You then see the email profile created. Compare this to the image in Step 19 for the difference.

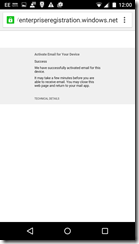
An Android, you will be informed that your device has successfully authenticated for email.

21 Email Configured Automatically Screenshot_2015-06-29-12-00-40
22 It is possible to rename the email profile. In this case it is via Settings > Email, Contacts, Calendars > Office 365 email > Account and then change the “Description” value 22 Renaming Email Profile  
23 Updated email profile listed 23 Email Profile listed  
24 Email should now sync with your device again. Notice that the email about needing to set up MDM is now missing and has been removed automatically.

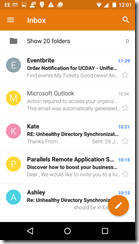
On the Android, drag the Inbox screen down to refresh it and your emails will appear.

24 Email available on device, enrollment email not available now Screenshot_2015-06-29-12-01-57
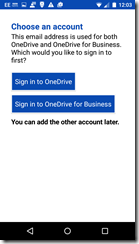
25 Now that the device is compliant (excepting the PIN number, which gives you 60 minutes of grace to complete this step) you can start other Office 365 aware applications. Here we are going to sign into OneDrive and show our OneDrive for Business data 25 Other Apps Screenshot_2015-06-29-12-03-12
26 Your app requires a login 26 Login for other apps Screenshot_2015-06-29-12-03-58
27 Which if you have an AD FS additional login you may also see 27 ADFS Login  
28 Your other app is now working, and in the case of OneDrive for Business did not need configuring 28 Other App Also Working  

Configuring Writeback Permissions in Active Directory for Azure Active Directory Sync

$
0
0

Azure Active Directory has been long the read-only cousin of Active Directory for those Office 365 and Azure users who sync their directory from Active Directory to Azure Active Directory apart from eight attributes for Exchange Server hybrid mode. Not any more. Azure Active Directory writeback is now available and in preview for some of the writeback types at the time of writing. This enabled objects to be mastered or changed in Azure Active Directory and written back to on-premises Active Directory.

This writeback includes:

  • Devices that can be enrolled with Office 365 MDM or Intune, which will allow login to AD FS controlled resources based on user and the device they are on
  • “Modern Groups” in Office 365 can be written back to on-premises Exchange Server 2013 CU8 or later hybrid mode and appear as mail enabled distribution lists on premises. Does not require AAD Premium licences
  • Users can change their passwords via the login page or user settings in Office 365 and have that password written back online.
  • Exchange Server hybrid writeback is the classic writeback from Azure AD and is the apart from Group Writeback is the only one of these writebacks that does not require Azure AD Premium licences.
  • User writeback from Azure AD (i.e. users made in Office 365 in the cloud for example) to on-premises Active Directory
  • Windows 10 devices for “Azure AD Domain Join” functionality

All of these features (apart from Exchange Hybrid writeback) require AADSync and not DirSync. Install and run the AADConnect program to migrate from DirSync to AADSync and then in the Synchronization Options on rerunning the AADConnect wizard you can add all these writeback functions.

Preparing for Device Writeback

If you do not have a 2012 R2 or later domain controller then you need to update the schema of your forest. Do this by getting a Windows Server 2012 R2 ISO image and mounting it as a drive. Copy the support/adprep folder from this image or DVD to a 64 bit domain member in the same site as the Schema Master. Then run adprep /forestprep from an admin cmd prompt when logged in as a Schema Admin. The domain member needs to be a 64 bit domain joined machine for adprep.exe to run.

Wait for the schema changes to replicate around the network.

Import the cmdlets needed to configure your Active Directory for writeback by running Import-Module ‘C:\Program Files\Microsoft Azure Active Directory Connect\AdPrep\AdSyncPrep.psm1’ from an administrative PowerShell session. You need Azure AD Global Admin and Enterprise Admin permissions for Azure and local AD forest respectively. The cmdlets for this are obtained by running the Azure AD Connect tool.


$accountName = "domain\aad_account" #[this is the account that will be used by Azure AD Connect Sync to manage objects in the directory, this is an account in the form of AAD_number].
Initialize-ADSyncDeviceWriteBack -AdConnectorAccount $accountName -DomainName contoso.com #[domain where devices will be created].

This will create the “Device Registration Services” node in the Configuration partition of your forest as shown:

image

To see this, open Active Directory Sites and Services and from the View menu select Show Services Node. Also in the domain partition you should now see an OU called RegisteredDevices. The AADSync account now has permissions to write objects to this container as well.

In Azure AD Connect, if you get the error “This feature is disabled because there is no eligible forest with appropriate permissions for device writeback” then you need to complete the steps in this section and click Previous in the AADConnect wizard to go back to the “Connect your directories” page and then you can click Next to return to the “Optional features” page. This time the Device Writeback option will not be greyed out.

Device Writeback needs a 2012 R2 or later AD FS server and WAP to make use of the device info in the Active Directory (for example, conditional access to resources based on the user and the device they are using). Once Device Writeback is prepared for with these cmdlets and the AADConnect Synchronization Options page is enabled for Device Writeback then the following will appear in Active Directory:

image

Not shown in the above, but adding the Display Name column in Active Directory Users and Computers tells you the device name. The registered owner and registered users of the device are available to view, but as they are SID values, they are not really readable.

Preparing for Group Writeback

Writing Office 365 “Modern Groups” back to Active Directory on-premises requires Exchange Server 2013 CU8 or later schema updates and servers installed. To create the OU and permissions required for Group Writeback you need to do the following.

Import the cmdlets needed to configure your Active Directory for writeback by running Import-Module ‘C:\Program Files\Microsoft Azure Active Directory Connect\AdPrep\AdSyncPrep.psm1’ from an administrative PowerShell session. You need Domain Admin permissions for the domain in the local AD forest that you will write back groups to. The cmdlets for this are obtained by running the Azure AD Connect tool.

$accountName = "domain\aad_account" #[this is the account that will be used by Azure AD Connect Sync to manage objects in the directory, this is an account usually in the form of AAD_number].
$cloudGroupOU = "OU=CloudGroups,DC=contoso,DC=com"
Initialize-ADSyncGroupWriteBack -AdConnectorAccount $accountName -GroupWriteBackContainerDN $cloudGroupOU

Once these cmdlets are run the AADSync account will have permissions to write objects to this OU. You can view the permissions in Active Directory Users and Computers for this OU if you enable Advanced mode in that program. There should be a permission entry for this account that is not inherited from the parent OU’s.

At the time of writing, the distribution list that is created on writeback from Azure AD will not appear in the address book. To add it to the address book in Outlook etc. run Update-AddressList in Exchange Server. Once group writeback is prepared for using these cmdlets here and AADConnect has had it enabled during the Synchronization Options page, you should see the groups appearing in the selected OU as shown:

image

Preparing for Password Writeback

The option for users to change their passwords in the cloud and have then written back to on-premises (with multifactor authentication and proof of right to change the password) is also available in Office 365 / Azure AD with the Premium Azure Active Directory or Enterprise Mobility Pack licence.

To enable password writeback for AADConnect you need to enable the Password Writeback option in AADConnect synchronization settings and then run the following three PowerShell cmdlets on the AADSync server:


Get-ADSyncConnector | fl name,AADPasswordResetConfiguration
Get-ADSyncAADPasswordResetConfiguration -Connector "contoso.onmicrosoft.com - AAD"
Set-ADSyncAADPasswordResetConfiguration -Connector "contoso.onmicrosoft.com - AAD" -Enable $true

The first of these cmdlets lists the ADSync connectors and the name and password reset state of the connector. You need the name of the AAD connector. The middle cmdlet tells you the state of password writeback on that connector and the last cmdlet enables it if needed. The name of the connector is required in these last two cmdlets.

To set the permissions on-premises for the passwords to be written back the following script is needed:

$passwordOU = "DC=contoso,DC=com" #[you can scope this down to a specific OU]
$accountName = "domain\aad_account" #[this is the account that will be used by Azure AD Connect Sync to manage objects in the directory, this is an account usually in the form of AAD_number].

$cmd = "dsacls.exe '$passwordOU' /I:S /G '`"$accountName`":CA;`"Reset Password`";user'"
Invoke-Expression $cmd | Out-Null

$cmd = "dsacls.exe '$passwordOU' /I:S /G '`"$accountName`":CA;`"Change Password`";user'"
Invoke-Expression $cmd | Out-Null

$cmd = "dsacls.exe '$passwordOU' /I:S /G '`"$accountName`":WP;lockoutTime;user'"
Invoke-Expression $cmd | Out-Null

$cmd = "dsacls.exe '$passwordOU' /I:S /G '`"$accountName`":WP;pwdLastSet;user'"
Invoke-Expression $cmd | Out-Null

Preparing for Exchange Server Hybrid Writeback

Hybrid mode in Exchange Server requires the writing back on eight attributes from Azure AD to Active Directory. The list of attributes written back is found here. The following script will set these permissions for you in the OU you select (or as shown at the root of the domain). The DirSync tool used to do all this permissioning for you, but the AADSync tool does not. Therefore scripts such as this are required. This script sets lots of permissions on these eight attributes, but for clarify on running the script the output of the script is sent to Null. Remove the “| Out-Null” from the script to see the changes as they occur (the script also takes a lot longer to run).

$accountName = "domain\aad_account"
$HybridOU = "DC=contoso,DC=com"

#Object type: user
$cmd = "dsacls '$HybridOU' /I:S /G '`"$accountName`":WP;proxyAddresses;user'"
Invoke-Expression $cmd | Out-Null
$cmd = "dsacls '$HybridOU' /I:S /G '`"$accountName`":WP;msExchUCVoiceMailSettings;user'"
Invoke-Expression $cmd | Out-Null
$cmd = "dsacls '$HybridOU' /I:S /G '`"$accountName`":WP;msExchUserHoldPolicies;user'"
Invoke-Expression $cmd | Out-Null
$cmd = "dsacls '$HybridOU' /I:S /G '`"$accountName`":WP;msExchArchiveStatus;user'"
Invoke-Expression $cmd | Out-Null
$cmd = "dsacls '$HybridOU' /I:S /G '`"$accountName`":WP;msExchSafeSendersHash;user'"
Invoke-Expression $cmd | Out-Null
$cmd = "dsacls '$HybridOU' /I:S /G '`"$accountName`":WP;msExchBlockedSendersHash;user'"
Invoke-Expression $cmd | Out-Null
$cmd = "dsacls '$HybridOU' /I:S /G '`"$accountName`":WP;msExchSafeRecipientsHash;user'"
Invoke-Expression $cmd | Out-Null

#Object type: group
$cmd = "dsacls '$HybridOU' /I:S /G '`"$accountName`":WP;proxyAddresses;group'"
Invoke-Expression $cmd | Out-Null

#Object type: contact
$cmd = "dsacls '$HybridOU' /I:S /G '`"$accountName`":WP;proxyAddresses;contact'"
Invoke-Expression $cmd | Out-Null

Preparing for User Writeback

Currently in preview at the time of writing, you are able to make users in Azure Active Directory (cloud users as Office 365 would call them) and write them back to on-premises Active Directory. The users password is not written back and so needs changing before the user can login on-premises.

To prepare the on-premises Active Directory to writeback user objects you need to run this script. This is contained in AdSyncPrep.psm1 and that is installed as part of Azure AD Connect. Azure AD Connect will install Azure AD Sync, which is needed to do the writeback. To load the AdSyncPrep.psm1 module into PowerShell run Import-Module ‘C:\Program Files\Microsoft Azure Active Directory Connect\AdPrep\AdSyncPrep.psm1’ from an administrative PowerShell session.

$accountName = "domain\aad_account" #[this is the account that will be used by Azure AD Connect Sync to manage objects in the directory, this is an account usually in the form of AAD_number].
$cloudUserOU = "OU=CloudUsers,DC=contoso,DC=com"
Initialize-ADSyncUserWriteBack -AdConnectorAccount $accountName -UserWriteBackContainerDN $cloudUserOU

Once the next AADSync occurs you should see users in the OU used above that match the cloud users in Office 365 as shown:

image

Prepare for Windows 10 BYOD

Windows 10 devices can “domain join” Azure Active Directory and be written back to the on-premises Active Directory.

The AdSyncPrep.psm1 module supports the following two additional cmdlets to prepare your Active Directory for Windows 10 device writeback:

Initialize-ADSyncDomainJoinedComputerSync
Initialize-ADSyncNGCKeysWriteBack

These cmdlets are run as follows:

$accountName = "domain\aad_account" #[this is the account that will be used by Azure AD Connect Sync to manage objects in the directory, this is an account usually in the form of AAD_number].
$azureAdCreds = Get-Credential #[Azure Active Directory administrator account]

Initialize-ADSyncDomainJoinedComputerSync -AdConnectorAccount $accountName -AzureADCredentials $azureAdCreds
Initialize-ADSyncNGCKeysWriteBack -AdConnectorAccount $accountName

Once complete, open Active Directory Sites and Services and from the View menu Show Services Node. Then you should see the GUID of your domain under the Device Registration Configuration container.

image

Password Writeback Errors

$
0
0

I had been struggling with password writeback testing and was coming across the following set of errors, and found that searching for them uncovered nothing online. So I wrote this blog to remind me and help you solve these issues. These errors are all visible in the Application log of the Event Viewer.

User Restrictions

The following error is because the user has “user cannot change password” option set in Active Directory:

EventID 33004: TrackingId: 7344da2c-ab9d-42ef-adea-4a17d07fdeb9, Reason: Synchronization Engine returned an error hr=80230626, message=The password could not be updated because the management agent credentials were denied access., Context: cloudAnchor: User_9b83f544-ba22-4ffb-bff5-c1c2374d654c, SourceAnchorValue: F39SWQrM2EidaboN8UC8Ww==, UserPrincipalName: ethan@contoso.co.uk, Details: Microsoft.CredentialManagement.OnPremisesPasswordReset.Shared.PasswordResetException: Synchronization Engine returned an error hr=80230626, message=The password could not be updated because the management agent credentials were denied access.
   at AADPasswordReset.SynchronizationEngineManagedHandle.ThrowSyncEngineError(Int32 hr)
   at AADPasswordReset.SynchronizationEngineManagedHandle.ChangePassword(String cloudAnchor, String sourceAnchor, String oldPassword, String newPassword)
   at Microsoft.CredentialManagement.OnPremisesPasswordReset.PasswordResetCredentialManager.ChangePassword(String encryptedChangePasswordRequestString, String publicKeyEncryptedSymmetricKey, String publicKeyEncryptedSymmetricIV)

And also, as the second error generated:

Event ID 6329: An unexpected error has occurred during a password set operation.
“BAIL: MMS(5716): ..\server.cpp(11139): 0x80230626 (The password could not be updated because the management agent credentials were denied access.)
Azure AD Sync 1.0.8641.0″

image

Group Policy Restrictions

Its possible that the errors you see for password writeback in the application log are due to restrictions on the user’s password that they have chosen. If the password is not complex enough then you get a warning in the password reset page the user is visiting in Azure, but you can also get this is a Group Policy restriction is in place even if you have set a strong password. The text in the error message in the Azure password change portal reads “This password does not meet your corporate password policy. Please make sure to use a mix of upper and lowercase letters, numbers, symbols, and to update your password to one that you haven’t used previously.”. Therefore though Azure accepted the passwords (original and new) the on-premises server rejected them with the following:

Event ID 33008: TrackingId: 3c8c78dc-9167-4286-9384-e2f0e777af87, Reason: Synchronization Engine returned an error hr=80230619, message=A restriction prevents the password from being changed to the current one specified., Context: cloudAnchor: User_9b83f544-ba22-4ffb-bff5-c1c2374d654c, SourceAnchorValue: F39SWQrM2EidaboN8UC8Ww==, UserPrincipalName: ethan@contoso.co.uk, Details: Microsoft.CredentialManagement.OnPremisesPasswordReset.Shared.PasswordResetException: Synchronization Engine returned an error hr=80230619, message=A restriction prevents the password from being changed to the current one specified.
   at AADPasswordReset.SynchronizationEngineManagedHandle.ThrowSyncEngineError(Int32 hr)
   at AADPasswordReset.SynchronizationEngineManagedHandle.ChangePassword(String cloudAnchor, String sourceAnchor, String oldPassword, String newPassword)
   at Microsoft.CredentialManagement.OnPremisesPasswordReset.PasswordResetCredentialManager.ChangePassword(String encryptedChangePasswordRequestString, String publicKeyEncryptedSymmetricKey, String publicKeyEncryptedSymmetricIV)

and

Event ID 6329: An unexpected error has occurred during a password set operation.
“BAIL: MMS(5236): ..\server.cpp(11139): 0x80230619 (A restriction prevents the password from being changed to the current one specified.)
Azure AD Sync 1.0.8641.0″

This of course seems self explanatory – your password is not complex enough for your rules on-premises but complex enough to get past the Azure initial checks that it imposes.

image

This error though is especially annoying in test scenarios where you have turned off all the complexity checks. To test why you are getting this error, first check its a password change error and not something else, and try and change the users password on-premises. You should get the same restriction. Then use the cmd prompt to check the password settings for the user.

</p> <p>net user username /domain</p> <p>

This will report the following:

User name                    user1
Full Name                    First Last
Comment
User’s comment
Country/region code          000 (System Default)
Account active               Yes
Account expires              Never

Password last set            7/7/2015 3:19:00 PM
Password expires             Never
Password changeable          7/8/2015 3:19:00 PM
Password required            Yes
User may change password     Yes

Workstations allowed         All
Logon script
User profile
Home directory
Last logon                   7/8/2015 10:31:05 AM

Logon hours allowed          All

Local Group Memberships
Global Group memberships     *Domain Users
The command completed successfully.

image

In this example, notice the highlighted. Here there password minimum age requirement in Group Policy has been removed:

image

But the domain controller (after running gpupdate to force the change to the domain controller) still enforces a single day to allow the change to occur.

For test scenarios, modify group policy to 0 days (rather than not defined) and probably increase the max age from the suggested default of 30 days:

image

After running gpupdate, you get the following for the net user command:

Password last set            7/8/2015 10:42:05 AM
Password expires             Never
Password changeable          7/8/2015 10:42:05 AM

Now you should be able to change your password in Azure against an on-premises user.

Strong Password Required

In the password change portal, the user is required to enter a strong password regardless of any restrictions that you have on-premises. So even if you are testing and have removed all history and complex and renewal requirements for the password, Azure will ensure that a strong password of 7 or more characters is entered regardless of your on-premises policy. In fact, Azure does not know your on-premises policy for password restrictions and enforces its own in addition to the one you have.

You get errors in the portal that read “Strong password required. Combine at least three of the following: uppercase letters, lowercase letters, numbers, and symbols.”. You also cannot reset the password to the same and the errors you get look like the following options:

image image image image 

Success

For completion of the blog, here is what you should see in the event log when it is working:

Event ID 31006: TrackingId: f430189d-984c-41d5-a4a6-333c66ffae1f, ChangePasswordRequestStart, Details: ethan@contosochemists.co.uk

Event ID 31007: TrackingId: f430189d-984c-41d5-a4a6-333c66ffae1f, ChangePasswordSuccess, Details: Context: cloudAnchor: User_9b83f544-ba22-4ffb-bff5-c1c2374d654c, SourceAnchorValue: F39SWQrM2EidaboN8UC8Ww==, UserPrincipalName: ethan@contosochemists.co.uk

DSC for Exchange Server

$
0
0

At DevConnections 2015 and at UCDay I delivered talks on DSC for Exchange Server 2013. The sample files are available from http://1drv.ms/1r1lmvf

Qualifications in Exchange Signatures

$
0
0

In a recent project I was working with iQ.Suite from GBS and specifically the component of this software that add signatures to emails. The client are an international organization with users in different geographies and we needed to accommodate the users qualifications in their email signature.

The problem with this is that in Germany qualifications are written in front of the name and in the USA at the end and in other countries at the start and the end. We were doing a Notes to Exchange migration and in Notes the iQ.Suite signature software read data from Notes that was originally pulled from Active Directory, and so the client had placed the qualifications in the DisplayName field in the Active Directory.

But when we migrated to Exchange Server the Global Address List listed the users DisplayName an so the German users where all listed together with “Dipl” as the first characters of their name. Also the name the email came from was written like this. The signature worked, but the other changes that became apparent meant we had to work out a different way to look at this problem.

So rather than using DisplayName for the users name and qualifications, we used personalPrefix in Active Directory to store anything needed before their name (Dipl in the above German example, and Prof or Dr being English examples) and the generationQualifier Active Directory attribute to store any string that followed the users DisplayName (such as Jr in the USA or BSc for qualifications etc.)

In iQ.Suite we created a signature that looked like the following. This has a conditional [COND] entry for personalTitle, displayName and generationQualifier. That is if each of these are present, then show the displayName with personalTitle before it and generationQualifier after it. If the user does not have values for these fields, do not show them. The [COND] control is documented in iQ.Suite.

[COND]personalTitle;[VAR]personalTitle[/VAR] [/COND][COND]displayName;[VAR]displayName[/VAR][/COND][COND]generationQualifier; [VAR]generationQualifier[/VAR][/COND]

What was not so well documented, and why I wanted to write this blog entry was that the personalTitle and generationQualifier attributes are not stored in the Global Catalog and so are missing in the users signature. In the multi-domain deployment we had at the client, iQ.Suite read the personalTitle, displayName and generationQualifier Active Directory attributes from the Global Catalog as Exchange was installed in a resource domain and the users in separate domains and so unless the attribute was pushed to the Global Catalog it was not seen by iQ.Suite.

To promote an attribute to be visible in the Global Catalog you need to open the Schema Management MMC snap-in, find the attributes of question and tick the Replicate this attribute to the Global Catalog field. This is outlined in https://technet.microsoft.com/en-us/library/cc737521(v=ws.10).aspx.


Exchange 2013 Partner Applications and Error 2008

$
0
0

When Exchange Server 2013 is configured to connect to Lync / Skype for Business Server one of the steps is to create a partner application. When this is first run the partner application stores the certificate presented by Lync Server in the Active Directory configuration partition. If the certificate changes on the Lync Server then the Exchange Server will start to alert about this every 15 minutes with the following warning: MSExchange OAuth and Event ID 2008.

SNAGHTML31fc566d

To fix this error we need to update the Active Directory configuration where the metadata info is kept (CN=LyncEnterprise-guid,CN=Partner Applications,CN=Auth Configuration,CN=Exchange Organization Name,CN=Microsoft Exchange, CN=Services, CN=Configuration, DC=domain,DC=co,DC=uk)

To do this you need to start Exchange Management Shell on Exchange 2013 and remove the Lync partner application. Immediately after you have done this you can create the partner application again. The cmdlets for this are as follows:

is the same as you used when you first created the partner application. This is as follows:

  1. In the Exchange Management Shell confirm you have one Lync partner application with Get-PartnerApplication | FL
  2. In the Exchange Management Shell run Remove-PartnerApplication Lync* and then confirm that you want to do this.
  3. In the Exchange Management Shell, change directory to the Exchange scripts folder with cd $exscripts
  4. Then run the script to configure a new partner application. An example would be .\Configure-EnterprisePartnerApplication.ps1 -AuthMetadataUrl ‘https://lyncSrv.domain.co.uk/metadata/json/1’ -ApplicationType Lync where the URL points to the Lync server and contains a valid name for the certificate on the Lync Server.

This should return the following and report that the configuration has succeeded.

SNAGHTML32094ac5

Your 2008 repeating errors in the Event Viewer will now be gone.

Exchange Server and Missing Root Certificates

$
0
0

I came across an issue with a clients Exchange Server deployment today that is not well documented – or rather it is, but you need to know where to look. So I thought I would document the troubleshooting steps and the fix here.

We specifically came across this error when testing Free/Busy for an Office 365 migration, though it could happen for a variety of reasons. Free/Busy and other lookups in a cross-forest Exchange Server deployment require a working organization configuration and this was failing. Running Test-FederationTrust (a prerequisite of the organization relationship) in verbose mode (add -Verbose to the end) returned the following:

Unable to retrieve federation metadata from the security token
service. Reason: Microsoft.Exchange.Management.FederationProvisioning.FederationMetadataException: Unable to access the
Federation Metadata document from the federation partner. Detailed information: “The underlying connection was closed:
Could not establish trust relationship for the SSL/TLS secure channel.”.

The final result of the test will also show two errors for “Unable to retrieve federation metadata from the security token service.” and “Failed to request delegation token.”

The last part of the verbose error is the clue here. The server in question is unable to make an SSL/TLS connection to the endpoint that the federation trust needs to reach to get the federation trust metadata. That endpoint is listed right at the start of the Verbose output. It reads:

VERBOSE: [16:53:08.306 GMT] Test-FederationTrust : Requesting Federation Metadata from
https://nexus.microsoftonline-p.com/FederationMetadata/2006-12/FederationMetadata.xml.

Now that we have a URL and an error message, check that the URL is reachable from each of your Exchange Servers. At my client today we found one server could not successfully reach this endpoint without an SSL error turning up in the browser. The problem was that the certificate that the endpoint is secure with is issued by the Baltimore Cybertrust Root Certificate – one that Microsoft uses for lots of services, but the root certificate was not installed on that machine. Lots of root certs where missing from that machine as it had never had a root certificate update applied to it.

We installed the latest Root Certificate Update and then the federation trust worked and free/busy etc. (mail tips, cross-forest message tracking etc.) all worked fine.

Installing Office 2016 Click To Run Via Group Policy

$
0
0

Office 2016 Click To Run (which comes with Office 365 subscriptions) can be deployed via Group Policy, but there are a few things that you need to know and do first. These are:

  1. You cannot use the “Software Installation” features of GPO’s to deploy the Office 2016 click to run software as this is an exe file, and “Software Installation” runs MSI files.
  2. You cannot run software with elevated installation rights, as the setup.exe shells out to other processes to run the installation (the officeclick2run.exe service).
  3. You cannot just drop the 2016 versions of the files in an existing 2013 deployment folder and expect the clients to update automatically – you must install 2016 to upgrade it and install it for the first time.

Therefore you need to deploy the software via a computer startup script. But this is not simple either as startup scripts run each time the computer starts up (obviously!) but will run regardless of whether the software is already installed. Therefore you need to run the installation by way of a startup script that first checks if Office 2016 click to run has already been installed or not.

To do this you need to following:

  1. A read only file share containing the Office 2016 click to run files. Not this folder should not be the folder that already contains the Office 2013 files if you have them on your network.
  2. A read/write file share to store log files on (the deployment script logs the start and completion of the installation in a central location)
  3. An XML file to install Office 2016 click to run customised to your environment and the fact that you are using GPO deployment
  4. A batch file to detect an existing Office 2016 click to run deployment and if not present to install Office 2016 click to run from your file share.
  5. And finally the Office 2016 Deployment Tool setup program. This is not the same as the 2013 version of this program.

Steps 1 and 4 are part of a standard Office 2016 click to run deployment process and so not covered in this blog post. But once you have downloaded the Office 2016 Deployment Tool and created the XML file in step 3 you can run the deployment tool with setup.exe /download config.xml to download the Office binaries to the file share mentioned in step 1. If you have Office 2013 already deployed via this method (see http://c7solutions.com/2014/09/installing-office-365-proplus-click-to-run-via-gpo-deployment for these steps) then make sure that this folder for the binaries is not the same folder as contains 2013 files. The Office 365 ProPlus installed (Office 2013 Click To Run) creates a subfolder called Office then another subfolder called Data. Into this it places v32.cab (or v64.cab) and other files. This cab file contains info relating to the version number of the software in this folder and if you download 2016 to the same folder it will replace this file, but 2013 installed machines will still try and upgrade from this folder and fail. Therefore create another folder. This is shown in the example scripts below.

So here are the steps and details for doing all this for GPO deployment:

Creating Deployment File Shares

Create a software deployment file share that you have read/write access to and everyone else read only and create a folder called Office365ProPlus inside this to store the binaries.

Create a second file share that everyone has read/write access to (or CREATOR OWNER has write so that only the creator of the file can write it to the share and others can read or not see it at all). Create a sub folder in InstallLogs called Office365ProPlus.

In my demo these two shares and subfolders are called \\server\Software\Office2016 and \\server\InstallLogs\Office2016.

Create an XML File for Office 2016 Click to Run Deployment

This XML file is as follows and is saved to \\server\Software\Office365ProPlus root folder. Call this file config.xml. You can create this XML file using the wizard at https://t.co/iKClyDgK3w

<Configuration>
<Add SourcePath="\\server\Software\Office2016\" OfficeClientEdition="32" Branch="Business" >
  <Product ID="O365ProPlusRetail">
    <Language ID="en-us" />
  </Product>
</Add>
<Updates Enabled="TRUE" UpdatePath="\\server\Software\Office2016\" Branch="Business"/>
<Display Level="None" AcceptEULA="TRUE" />
<Logging Path="%temp%" />
</Configuration>

The important entries of no display and the Extended User Licence Agreement having been accepted are important, as GPO deployment works as a system service and so cannot display anything to the screen. Also see http://technet.microsoft.com/en-us/library/jj219426(v=office.15).aspx for the XML reference file for other settings you can contain here such as updates from the Internet (UpdatePath=””) or no updates (Updates Enabled=”FALSE”), the 2016 Branch value and multiple languages (add more <Language ID=”xx-xx” /> nodes to the file), etc.

Download the Office 2016 Click to Run Binaries

Download the Office Deployment Tool from http://www.microsoft.com/en-us/download/details.aspx?id=49117 and if you downloaded this a few months ago, download it again as it changes frequently and improves the setup process.

Install this software to get setup.exe and some example XML files. Copy setup.exe to \\server\Office2016.

Run \\server\Office2016\setup.exe /download \\server\Office2016\config.xml to download the latest version (or the specified version if you have added Version=”15.1.2.3″ to config.xml where 15.1.2.3 is the build number you want to install). This will create the Office\Data folder in the \\server\Office365ProPlus share and download the binaries and any languages specified in the XML to that location – do not modify the folder structure as the Office Deployment Tool will expect this structure to find the files under during installation.

Create A CMD File To Script The Install

In Notepad create a cmd file and save it to <strong\\server\Office365ProPlus as well. It will eventually go in the GPO folder location, but this will be your master copy. The cmd file will look like the following and for this demo is called _InstallOffice2016GPO.cmd

setlocal
REM *********************************************************************
REM Environment customization begins here. Modify variables below.
REM *********************************************************************
REM Set DeployServer to a network-accessible location containing the Office source files.
set DeployServer=\\server\Software\Office2016
REM Set ConfigFile to the configuration file to be used for deployment (required)
set ConfigFile=\\server\Software\Office2016\config.xml
REM Set LogLocation to a central directory to collect script log files (install log files are set in XML file).<br>set LogLocation=\\server\InstallLogs\Office2016
REM *********************************************************************
REM Deployment code begins here. Do not modify anything below this line (check quotes are quotes though).
REM *********************************************************************
IF NOT "%ProgramFiles(x86)%"=="" (goto ARP64) else (goto ARP86)
REM Operating system is X64. Check for 32 bit Office in emulated Wow6432 registry key
:ARP64
reg query HKLM\SOFTWARE\WOW6432NODE\Microsoft\Office\16.0\ClickToRunStore\Packages\{9AC08E99-230B-47e8-9721-4577B7F124EA}
if NOT %errorlevel%==1 (goto End)
REM Check for 32 and 64 bit versions of Office 2013 in regular registry key.(Office 64bit would also appear here on a 64bit OS)
:ARP86
reg query HKLM\SOFTWARE\Microsoft\Office\16.0\ClickToRunStore\Packages\{9AC08E99-230B-47e8-9721-4577B7F124EA}
if %errorlevel%==1 (goto DeployOffice) else (goto End)
REM If 1 returned, the product was not found. Run setup here.
:DeployOffice
echo %date% %time% Setup started. >> %LogLocation%\%computername%.txt
start /wait %DeployServer%\setup.exe /configure %ConfigFile%
echo %date% %time% Setup ended with error code %errorlevel%. >> %LogLocation%\%computername%.txt
REM If 0 or other was returned, the product was found or another error occurred. Do nothing.
:End
Endlocal

This will be run by GPO and at computer startup look for the Click To Run registry key that indicates Office has been installed. If not found for 64 or 32 bit OS’s and 64 or 32 bit installations of Office then it will deploy office.

Create A Group Policy Object

Create in your domain a GPO object over an OU that contains the computers you want to install Office 2016 click to run on. This will run on all computers in this OU, so start with a test OU containing one or a few computers or use permissions to lock the GPO object down to specific computer accounts.

In this GPO set the following:

  1. A startup script that runs _InstallOffice2016GPO.cmd. A startup script will have a folder the script is located in (click Show Files button in the GPO editor) and copy the above cmd file from the Office deployment share to this folder.
  2. Then click Add and select the file – there are no script parameters.
  3. Your GPO object will look like this.
    image
  4. In Adminstrative Templates/System/Scripts set the Maximum wait time for Group Policy scripts to 1800 seconds. This is 30 minutes. The default is 10 minutes (600 seconds) but I have found Office installs take just over ten minutes on a LAN and longer if the fileshare is remote to the client computer. The script will be cancelled if it takes over 30 minutes, so you may need a higher value for your network.

Deploy Office 2016 Click to Run Click To Run

Run gpupdate /force on a test computer that is under the scope of your GPO object and then reboot the computer. The installation will start automatically and Office will be ready to use a few minutes after reboot. Office takes about 10 minutes to fully install on a LAN but can be used about 2 or 3 minutes after installation starts. Though in my lab with a low resourced file server it took 30 minutes to install. Do not reboot the PC in that time.

Check \\server\InstallLogs\Office2016 for a file named after the computer. This will have two lines, one for the start of the deployment and one at the end (with “Setup ended with error code 0” if successful).

Unable To Remove Office 365 Domain Error

$
0
0

If you need to remove a domain from Office 365 it needs to not be in use. This includes the services that use that domain, for example an Accepted Domain in Exchange Online. If though you have an expired, maybe test, Office 365 tenant and you want to remove a domain from it you may find unhelpful error messages. For example I have seen in the domain removal process in the portal a message saying “Please don’t close this page while we remove your domain” etc. It tries for several minutes as it predicts, but did not complete:

image

Upon failing to complete you get a further warning before it finally gives up and tells you that it cannot complete:

image

So the obvious next step (or obvious to me anyway) is to try the removal in remote PowerShell to Office 365. The cmdlet is Remove-MsolDomain -DomainName domain.com but this comes back with with messages that might be helpful, but after repeated running of the cmdlet and fixing the error still suggests the same fix.

image

The error reads: Remove-MsolDomain : Unable to remove this domain. Use Get-MsolUser -DomainName <domain name>  to retrieve a list  of objects that are blocking removal. The problem with this error is the list of objects here are only user accounts and not any of the other objects that could block a domain removal.

So sure, remove your unneeded users or change their UPN/email address to not include this domain that you want to remove, but also run Get-MsolContact and Get-MsolGroup and then remove or edit the contacts and the groups that use this domain.

So though the error says to fix the user objects that are blocking domain removal, you also need to fix or remove the groups and contacts as well.

Checking for Login Issues with AD FS and Office 365

$
0
0

This post will look at how you can view login errors in AD FS, trace them back to the Event Viewer on your AD FS server(s) and then help the user login correctly.

Unlike earlier versions of ADFS it is not required to enabled config files and registry keys to turn on additional logging. All login failures (not successes) are reported to the AD FS log in the Event Viewer on the AD FS Server. If you have more than one server either always check all servers or setup log file synchronization to another server.

To view the AD FS log file in Event Viewer navigate to Applications and Services Logs > AD FS > Admin – errors on that box are shown here. If you have a correlation Activity ID (see below) you can find that here and track errors back to the entry in the logs.

Applications and Services Logs Further errors (problems with system, more detailed debugging errors) can also be recorded. Click Applications and Services Logs in Event Viewer then right-click and choose View > Show Analytic and Debug Logs. Note to see View you need to click on Applications and Services Logs and not just right-click it.

clip_image002

Once Analytic and Debug Logs are visible you can find the AD FS Debug log. This is under Applications and Services Logs > AD FS Tracing > Debug.

You need to right-click this log file and choose Enable Log. Then get the user to repeat the issue. It will be logged in great detail here. Once user finished, disable logging and save file. You can search the file once it is saved. It is possible to search the file during log collection, but you can only search one page of data at a time and the pages are both small and generated quite quickly – so save the log file before searching it.

An example of some of the data that can be read in the debug log is shown below. This log has the Activity ID shown as well, and this can be correlated back to the error message that you might see in AD FS during login if ADFS is not working.

image

Viewing all 187 articles
Browse latest View live